Did You Know How To Create cPanel Email Account


An email account in cPanel refers to an electronic mailbox associated with your domain that allows you to send, receive, and store emails. cPanel is a web-based control panel often provided by web hosting companies to manage various aspects of your hosting account, including email services.
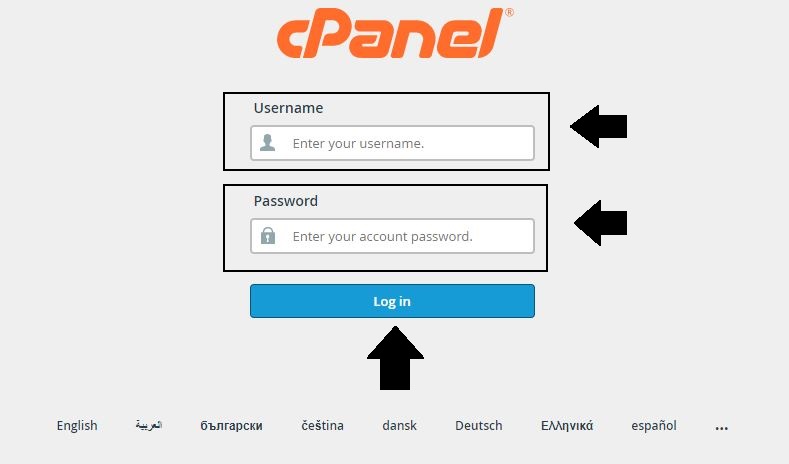
1. Login to cPanel:
- Open your web browser.
- You can login through the URL: https://om.genxwhosting.com:2083 or https://yourdomain.com:2083. in the address bar.
- Enter your cPanel username and password.
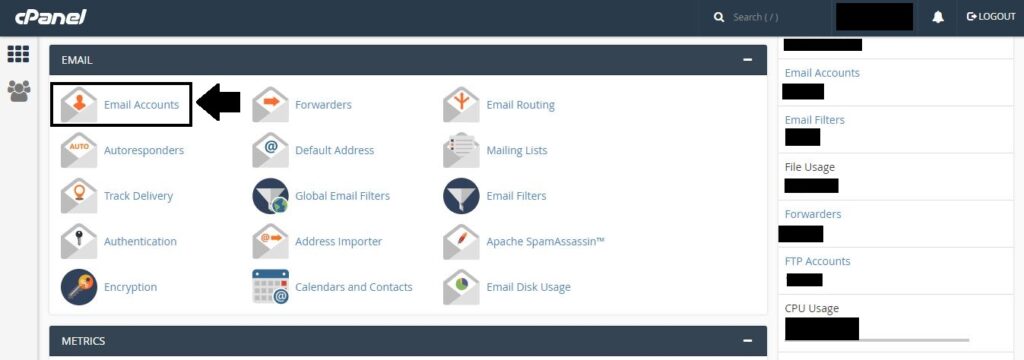
2. Create an Email Account
- In the Email section, find and click on “Email Accounts”.
- Access webmail or configure email clients.
- Set up email forwarding and autoresponders.
3. Fill in Account Details:
- Choose a username for your email account. This will be the part before the “@” symbol, (e.g.”abc@example.com“).
- Select the domain for your email address from the drop-down menu.
- Set a protected password for the email account.
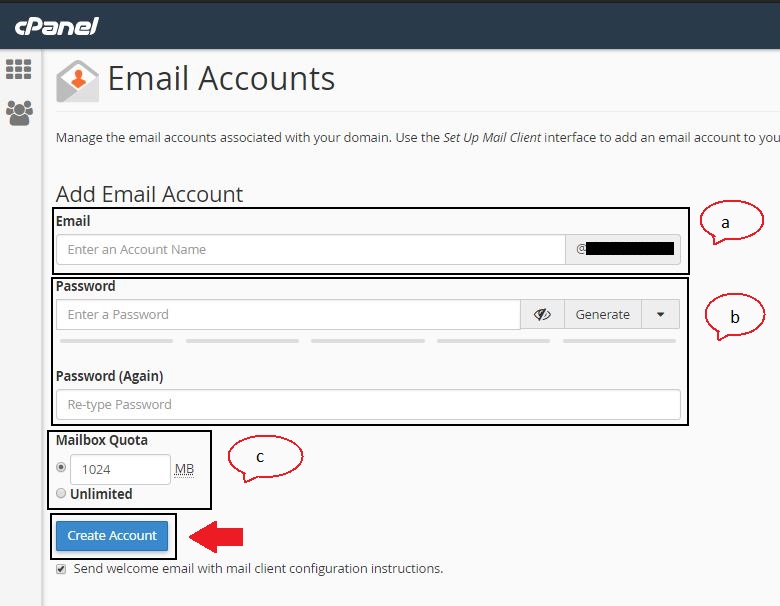
4. Configure Additional Settings (Optional):
- Some cPanel setups may provide additional options such as mailbox quota (storage limit), spam filters, and more. Change these settings according to your tendencies
5. Create the Account:
- Once you’ve filled in the necessary information, click on the “Create Account” or a similar button to create the email account.
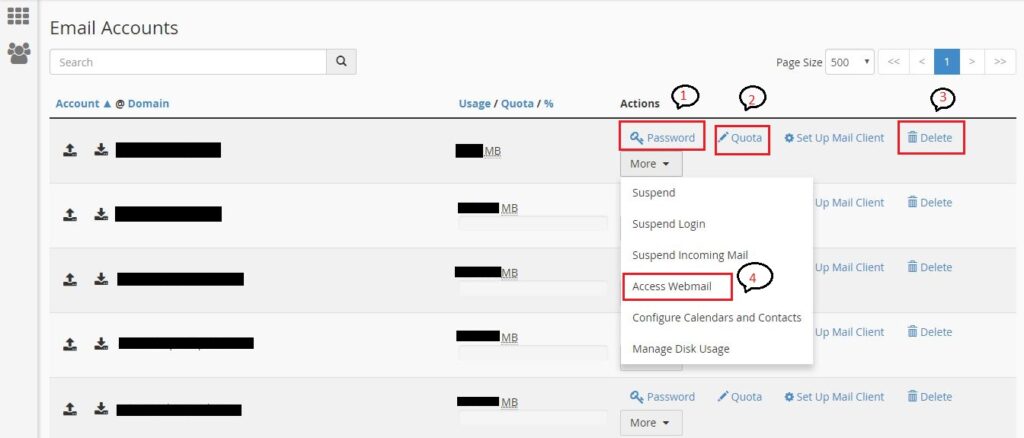
6. Accessing Email:
- After creating the email account, you can access your email through webmail (usually accessible via
http://yourdomain.com/webmail), or you can set up an email client (like Outlook, Thunderbird, or your mobile device) using the provided configuration details.
Category:cPanel

Gen X Web Hosting
Experts in high-performance cloud infrastructure, domain management, and optimized web hosting solutions.
Visit Website open_in_new