

In this blog, I will show you an easy way to send and receive your work emails using Gmail. This means you can use Gmail to handle email from your work address, which uses your company’s domain name. I will guide you through the steps to set up your work email in Gmail. Follow these instructions to keep your work email running smoothly in Gmail.
Required Information
- Username: user@yourdomain.com (your full email address)
- Password: use whatever password you were assigned
- POP Server: mail.yourdomain.com (replace yourdomain.com with your domain name)
- SMTP Server: mail.yourdomain.com (change yourdomain.com with your actual domain name)
Step 1. First do with your Gmail Setting:
- Login to your Gmail account.
Go to Settings:
- Select the gear symbol in the right corner.
- Select “See all settings.”
Step 2. Add Work Email to Gmail
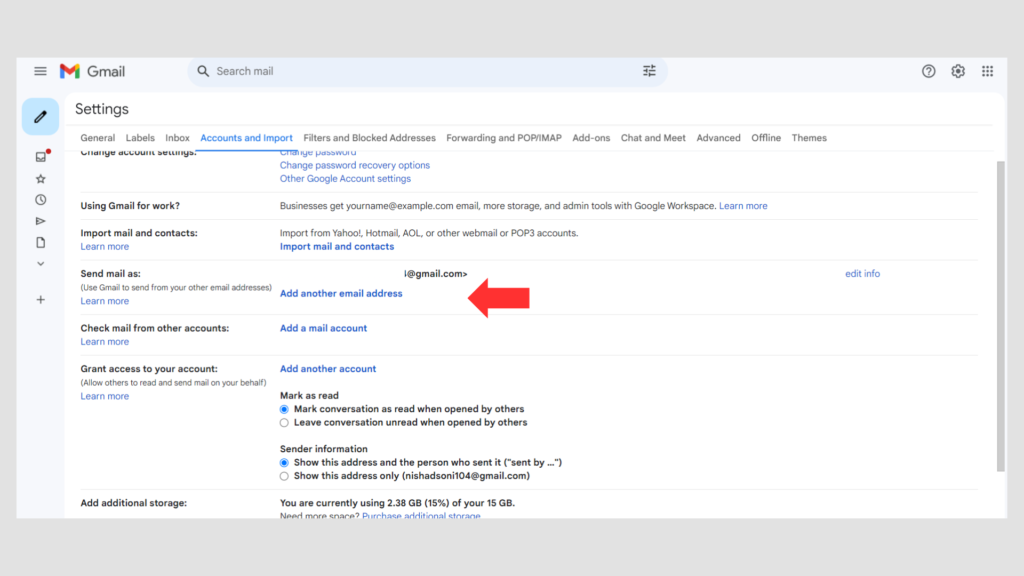
Accounts and Import:
- Go to the “Accounts and Import” tab.
- In the “Check mail from other accounts” section, click “Add a mail account.”
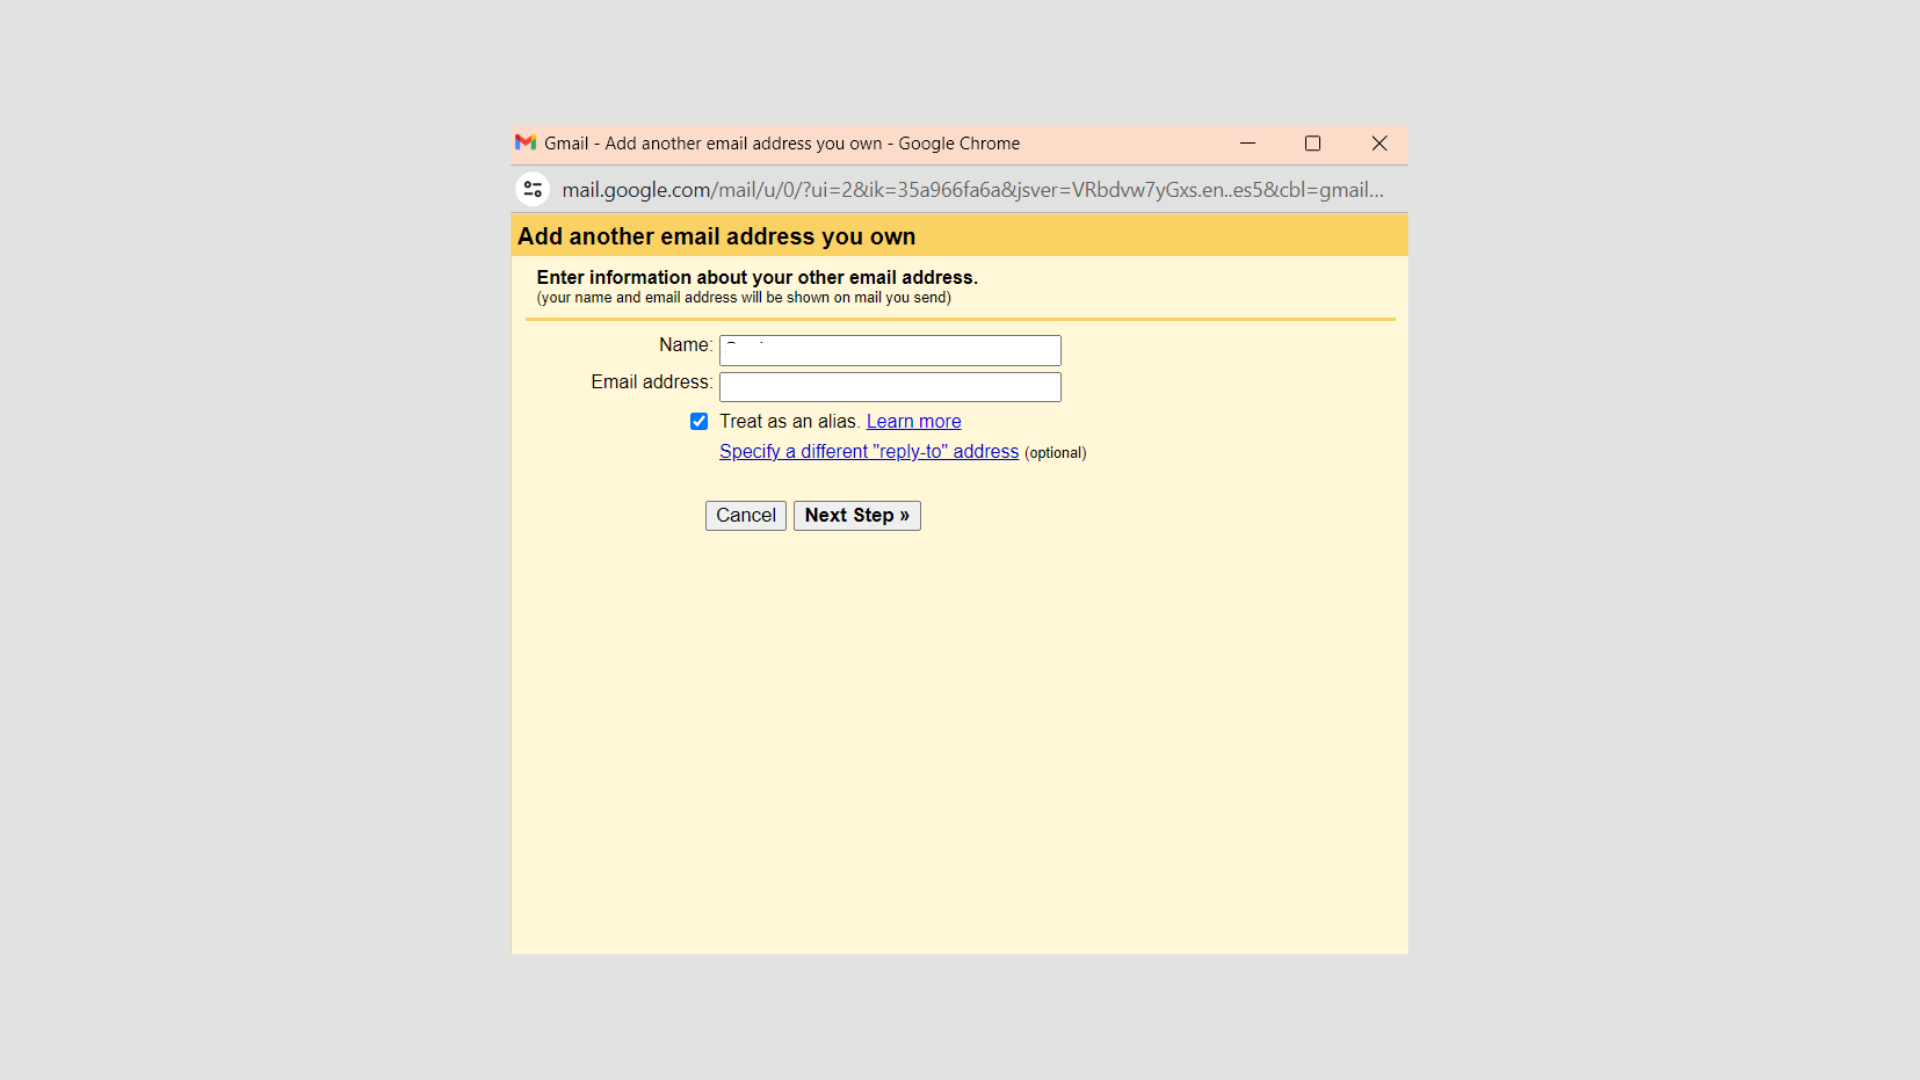
Enter Your Work Email Address:
- A pop-up window will appear. Enter your work email address and select “Next.”
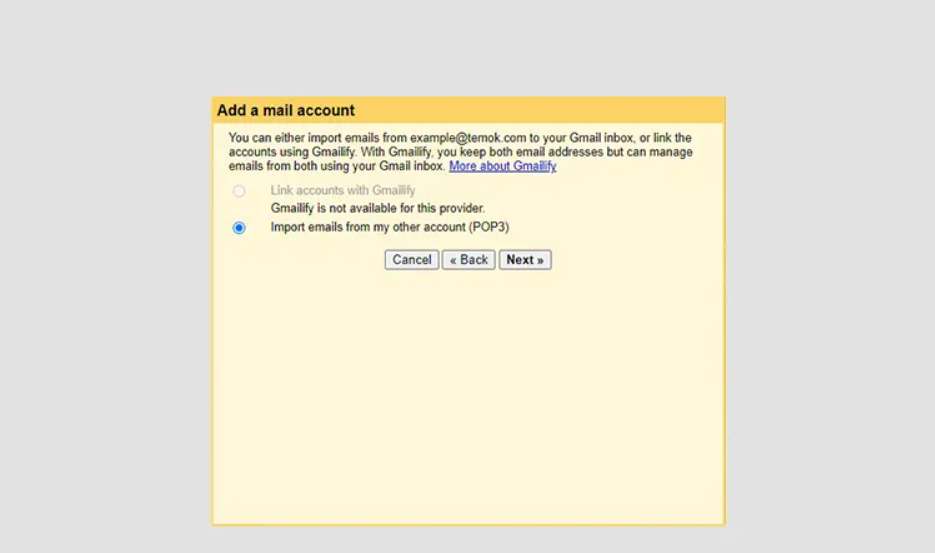
Choose Import Option:
- Select “Import emails from my other account (POP3)” and click “Next.”
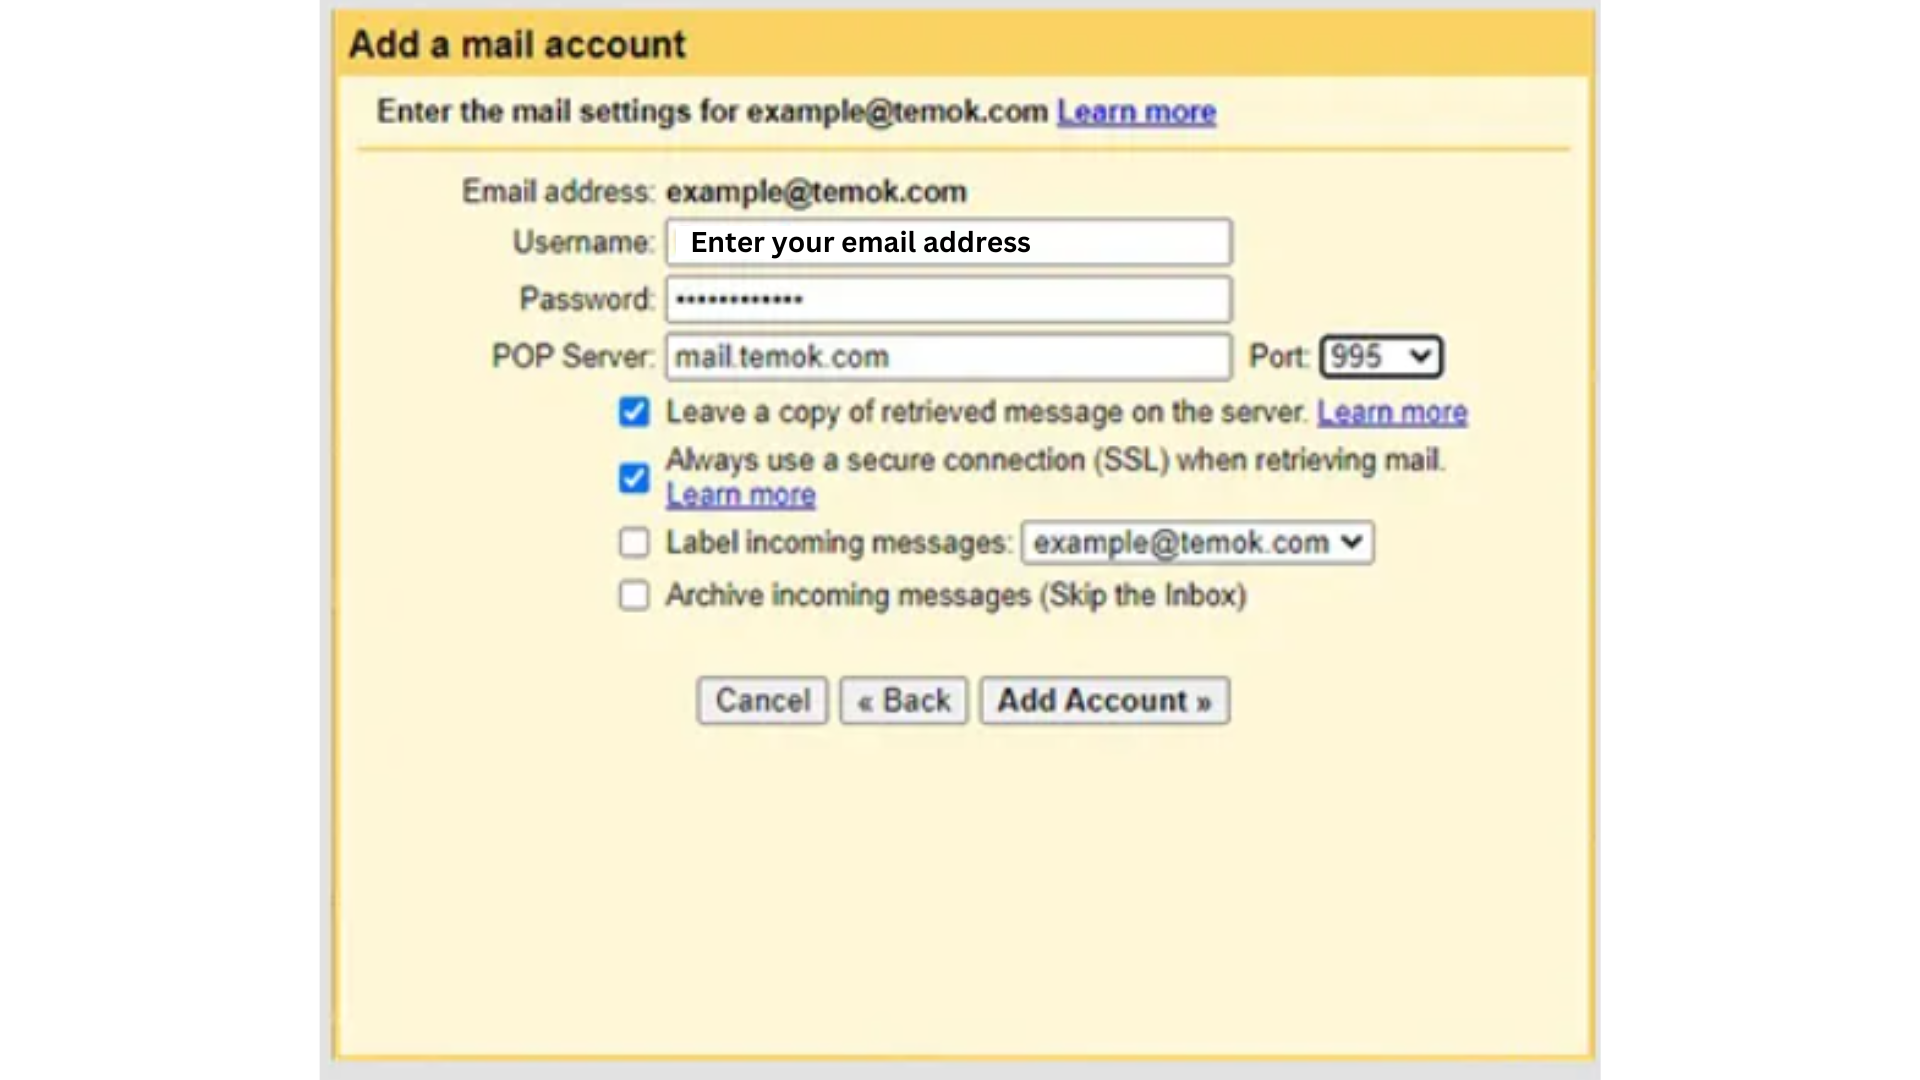
Enter Work Email Account Information:
- Enter your work email account’s username (typically your email address) and password.
- Enter the POP3 server and port information. (For example, the server might be mail.yourcompany.com and the port might be 995 for SSL connections.)
- Decide whether to leave a copy of the retrieved message on the server.
- You can also choose to label incoming messages with your work email address for easier identification.
- Click “Add Account.”
Step 3. Configure Sending from Gmail
- Send Mail As:
- After successfully adding your work email for fetching mail, Gmail will ask if you want to be able to send emails as your work email address. Select “Yes” and click “Next Step.”
- Enter your name and work email address.
- Choose whether to treat your work email as an alias.
- Click “Next Step.”
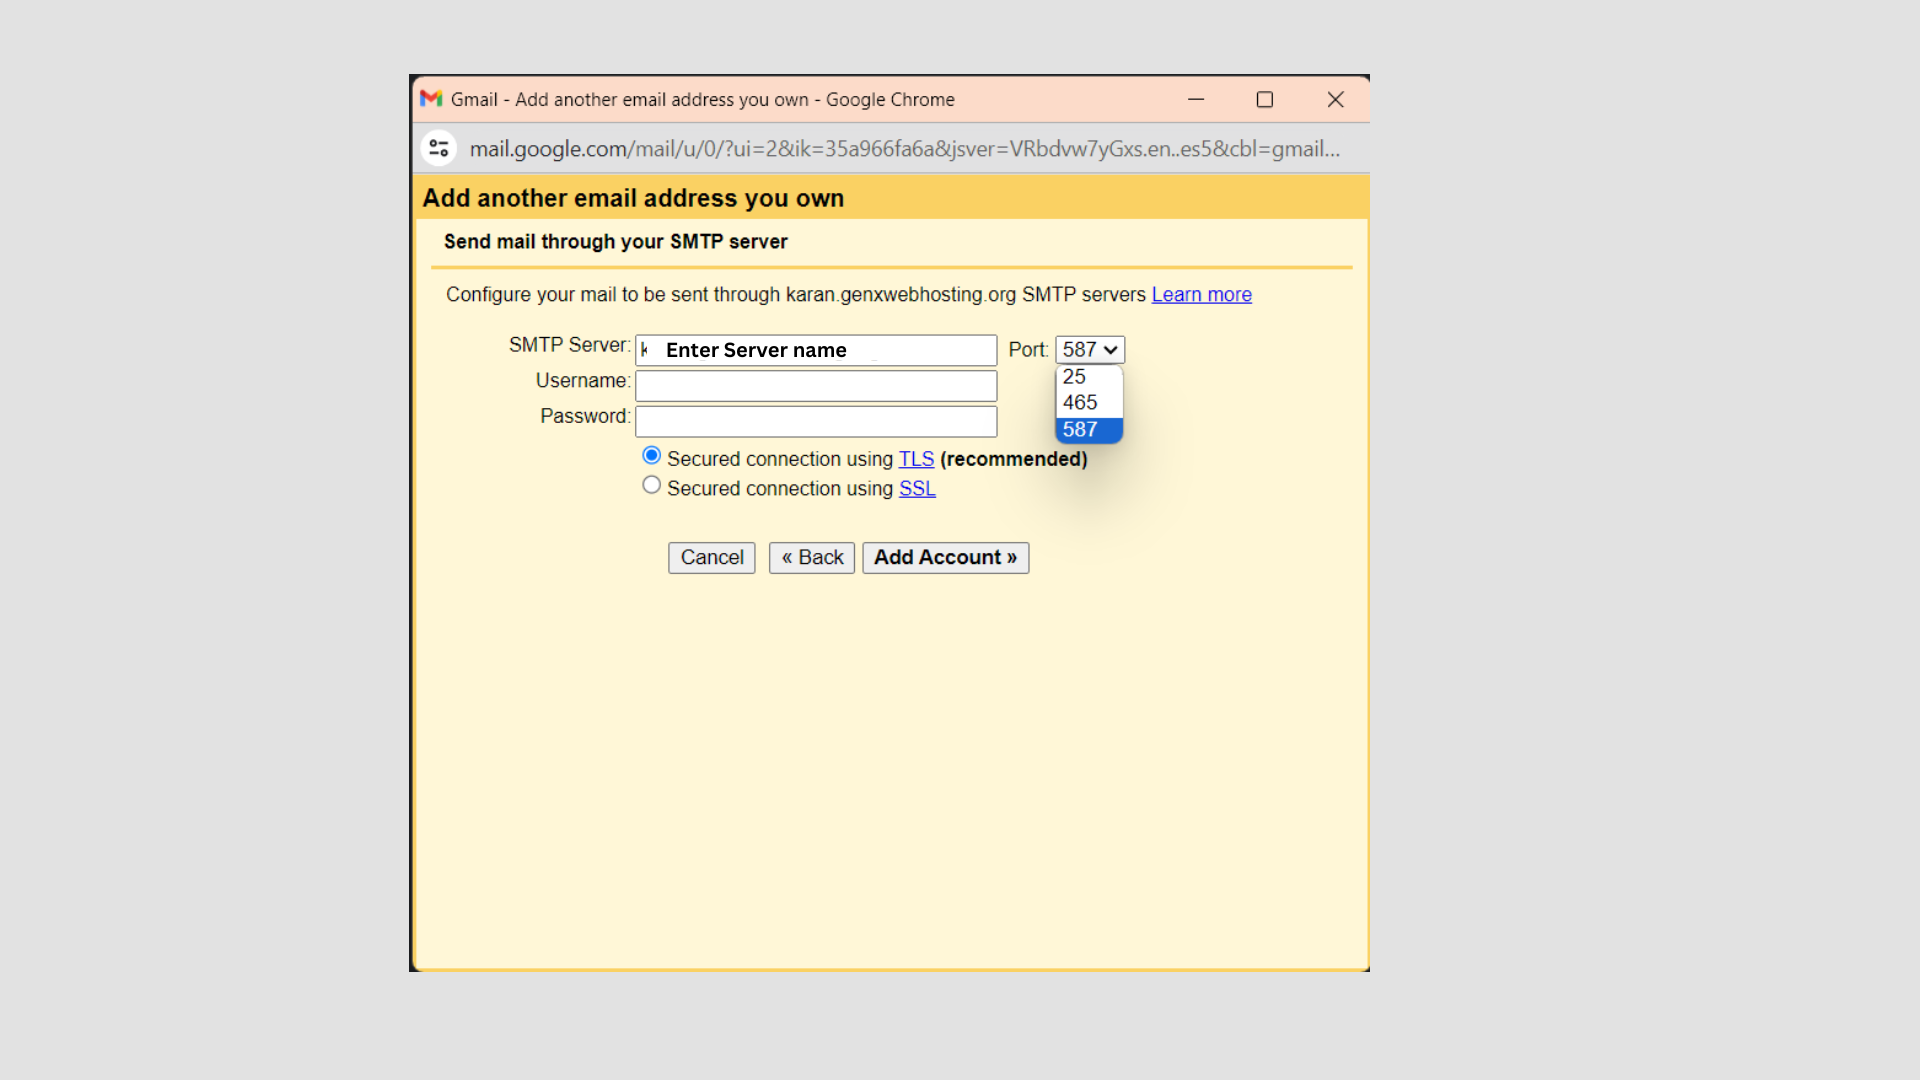
- Configure SMTP Server:
- Enter the SMTP server information for your work email. This is often smtp.yourcompany.com and might require port 465 or 587.
- Enter your work email address and password again.
- Choose the appropriate connection security (SSL or TLS).
- Click “Add Account.”
Verification:
- Gmail will send a verification email to your work email address. Open your work email account (via webmail or any other email client), find the email from Gmail, and click the verification link or enter the verification code in Gmail.

