

A cPanel is a web-based management panel. It is used to administer and manage servers and web pages. Its user-friendly graphical interface is intended to make the process of hosting a website as simple as possible. Shared hosting companies,avirtual private servers (VPS), and dedicated servers are frequently combined with cPanel’s.
Advantages of cPanel:
User-Friendly Interface: Even those without technical experience can easily manage their websites and servers with the help of cPanel’s user-friendly graphical interface.
Automation: It minimizes the need for human intervention by automating a number of server management operations, including defining security settings, and creating email accounts.
Multifunctionality: It incorporates a number of tools and capabilities for managing websites, such as email configuration, file management, domain management, and website analytics.
Security Features: To assist safeguard websites and servers, cPanel comes with security tools and features including firewalls, password-protected directories, and SSL certificate installation.
Backup and Restore: It comes with tools for backing up databases and webpages, which makes data recovery simpler in the event of unforeseen problems.
Drawbacks using cPanel:
Cost: Although many shared hosting companies include cPanel in their packages, some could charge extra to utilize it.
Resource Usage: It may use a lot of resources, especially on servers with less power, which could affect performance.
Limited customisation: Because cPanel abstracts away some server-level configurations, advanced users may find it rather restricting in terms of customisation.
Learning Curve: Even with its user-friendly appearance, web hosting principles can still require some familiarity on the part of users.
Applying cPanel:
- Selecting a Hosting Provider: Choose a hosting provider that offers cPanel as part of their hosting packages.
- Creating an Account: Sign up for a hosting plan that includes cPanel. This typically involves selecting a domain name and payment plan.
- Accessing cPanel: After signing up, the hosting provider will provide login credentials to access cPanel. This is usually done through a web-based interface.
- Managing Settings: Use cPanel’s interface to manage various aspects of your website, including domain settings, email accounts, databases, and security features.
- Installing Applications: cPanel often includes features like Softaculous or Fantastico, allowing you to easily install popular applications, content management systems, and scripts.
- Regular Maintenance: Perform regular backups, updates, and security checks to ensure the smooth operation of your website.
How to Use cPanel ?
It is a popular web hosting control panel that allows users to manage their websites and server settings through a user-friendly interface.
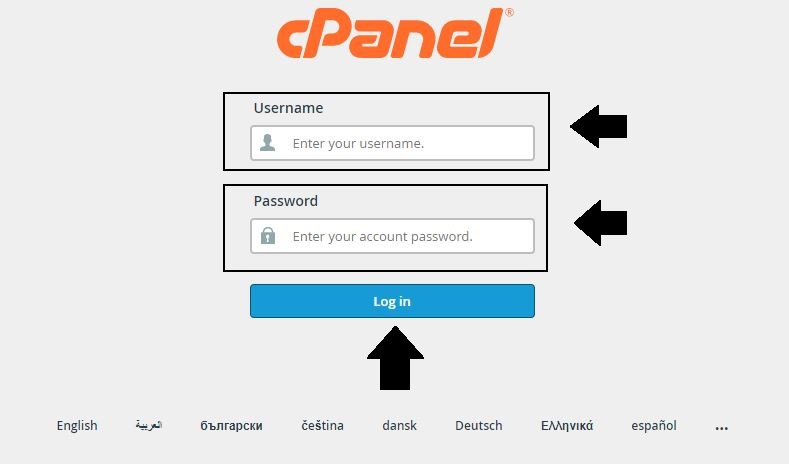
1.Getting into cPanel:
- Open your web browser.
- You can login through the URL: https://om.genxwhosting.com:2083 or https://yourdomain.com:2083 in the address bar.
- Enter your cPanel username and password.
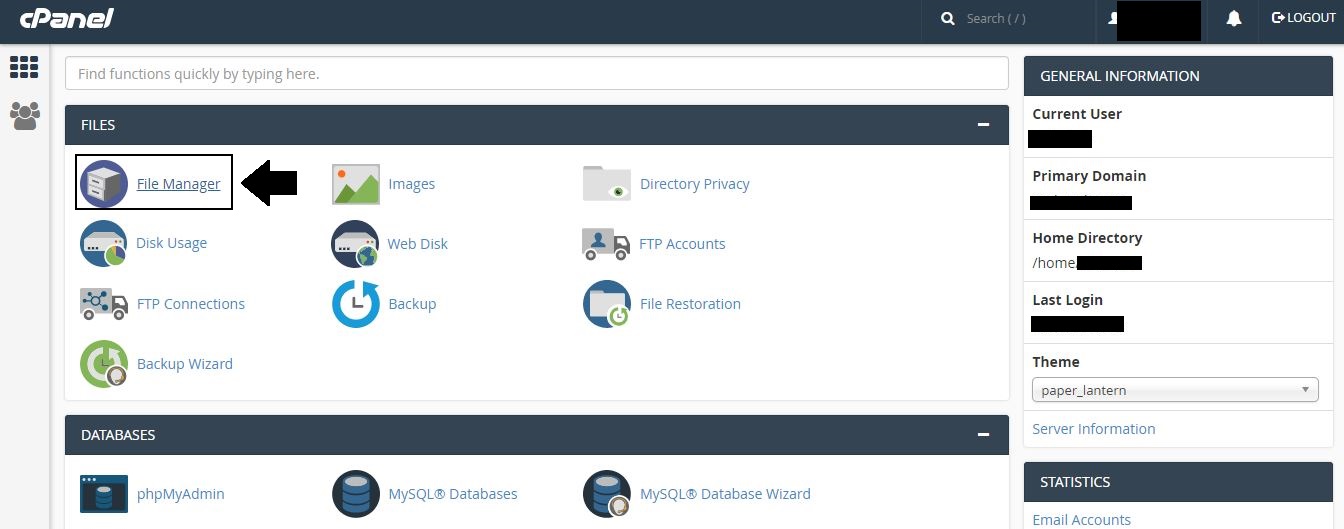
2. cPanel Dashboard:
- After login, you’ll see the cPanel dashboard.
- The dashboard contains various icons representing different functions.

3. File Management (File Manager):
- Navigate to “File Manager.”
- You can upload, download, delete, and edit files here.
- Create, move, or rename folders and files.
1. Open File Manager:
- Locate the “Files” area.
- Press the “File Manager” symbol
2. Organize and Navigate Files:
- Through the File Manager interface, you can explore your directory structure.
- From here, you can directly create, upload, download, remove, and edit files and directories.
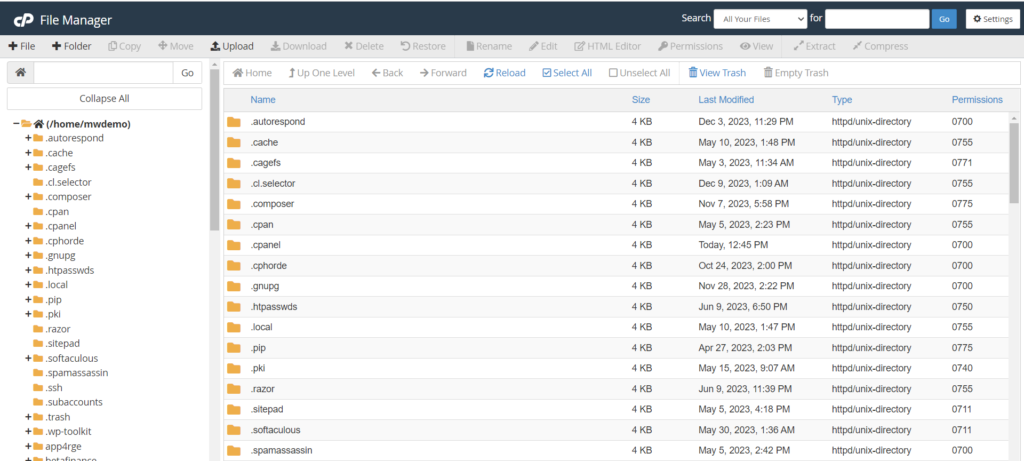
3. File Management:
- To manage a file or directory, right-click on it.
- There are options like “Edit,” “Copy,” “Move,” “Delete,” and “Upload” accessible.
4. File Upload:
- To upload files to the server from your local computer, click the “Upload” button.
5. Make Directories or Files:
- To create new files or directories, use the “New File” and “New Folder” buttons.
6. Modify the files:
- To modify code or text files, click the “Edit” button to launch a text editor.
7. Authorizations:
To change the rights of a file, right-click on it or on a directory, then choose “Change Permissions.”

