
Database Management (MySQL Databases)
- Create database and manage MySQL databases.
- Add databases users and set privileges.
- Access phpMyAdmin for database administration.
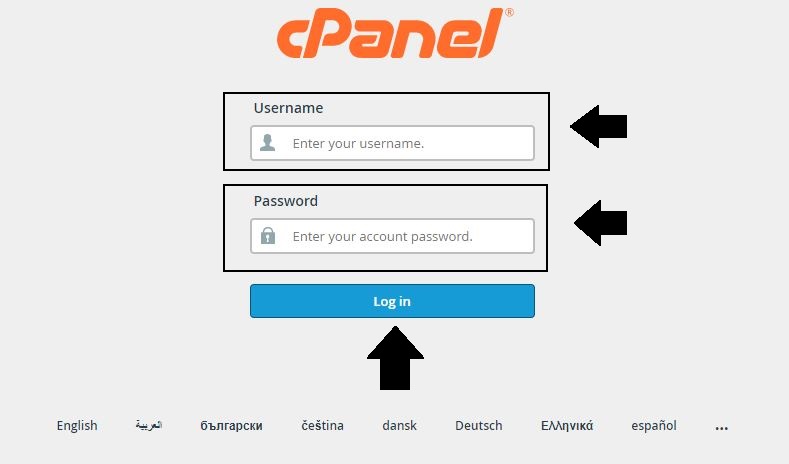
- Login to cPanel:
- Open your web browser.
- You can login through the URL: https://om.genxwhosting.com:2083 or https://yourdomain.com:2083. in the address bar.
- Enter your cPanel username and password.
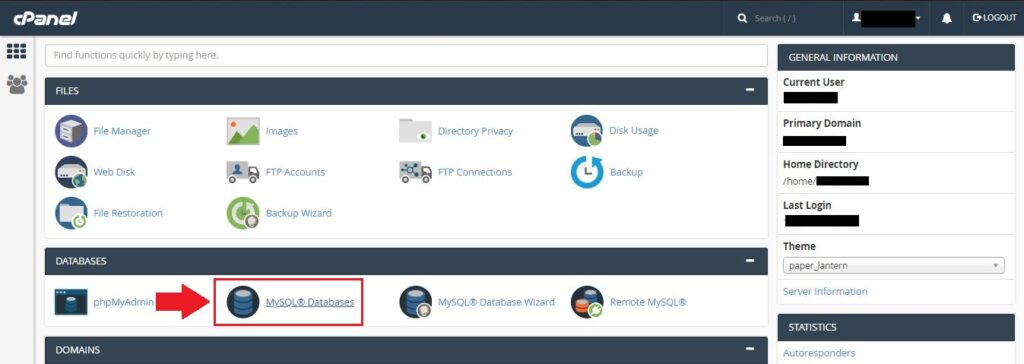
2. Navigate to MySQL Database in Databases tab.
- In the cPanel dashboard, look for the “MySQL Databases” or a similar option. This simplifies the process of creating a new databases and user.
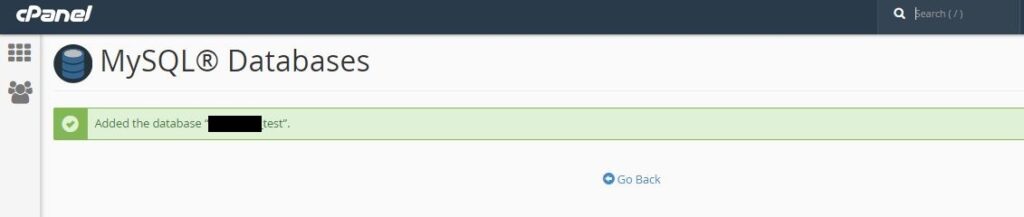
3. Create a Database:
- Click on the “MySQL Databases”.
- Enter a name for your data sets and snap “Following stage.”
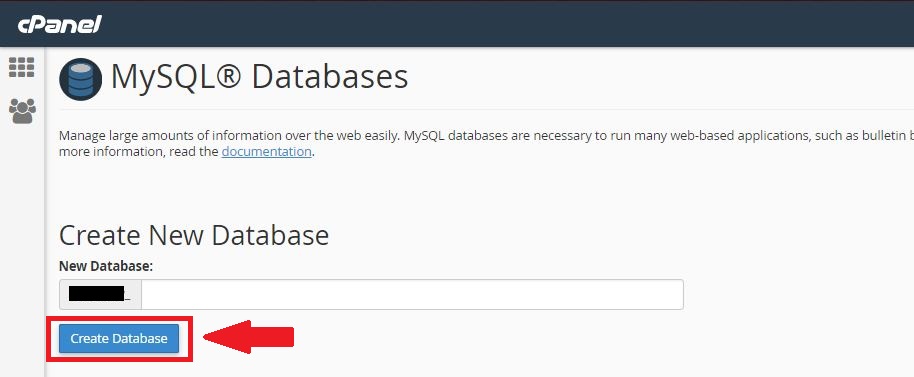
4. After the database is created you will get a success message.
5. You can see the databases list on MySQL Databases page.

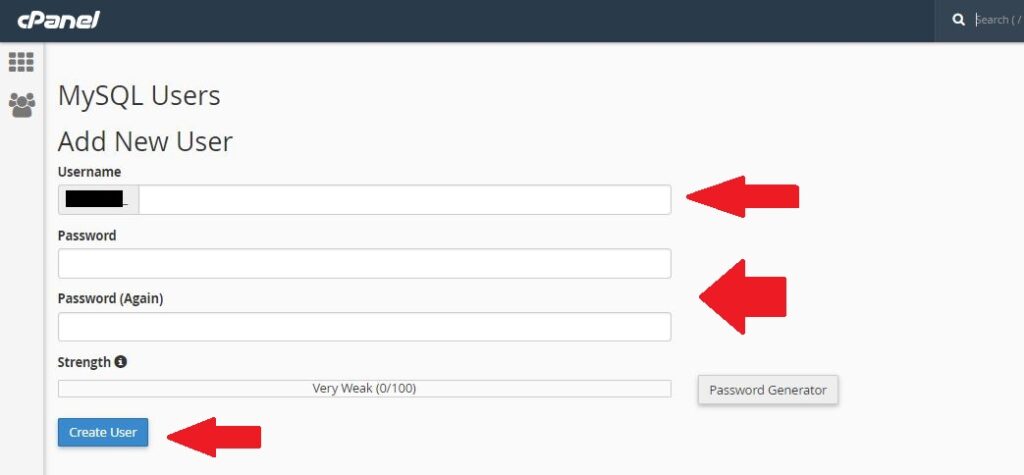
6. Create a Add New Database User:
- Enter a username.
- Enter a strong password or use the “Password Generator” provided by cPanel.
- Click “Create User.”
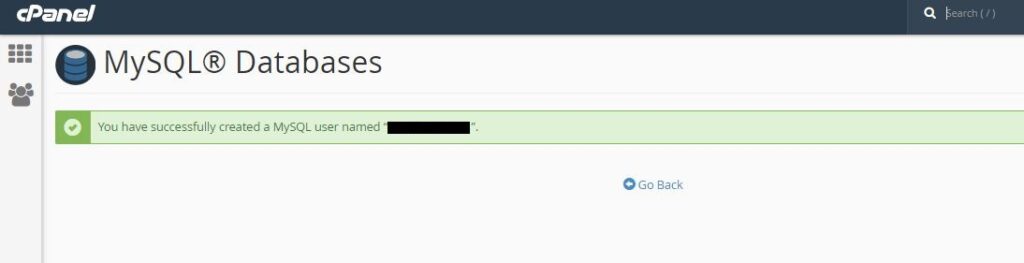
6. You will get a success message after creating the user for databases.
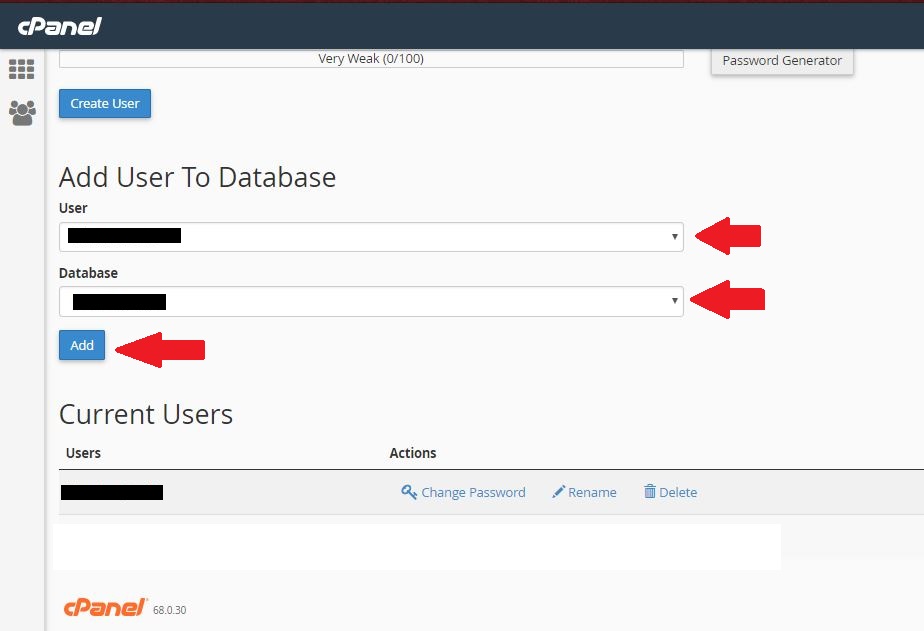
7. Assign User to Databases:
- On the next screen, you’ll be asked to assign the user to the databases.
- Choose the databases and users you just created from the dropdown menus.
- Click “Next Step.”
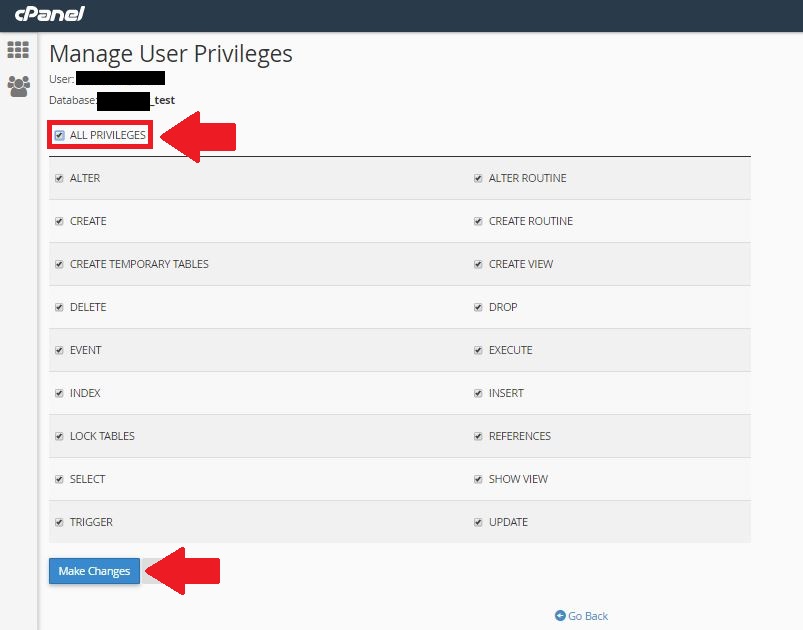
8. Set Privileges:
- Specify the privileges you want to grant to the user.
- For most applications, you’ll need to grant privileges like “SELECT,” “INSERT,” “UPDATE,” and “DELETE.”
- Click “Next Step.”
9. Complete the Wizard:
- The wizard will confirm that you’ve successfully created the databases and user.
- Take note of the database’s name, username, and privileges.
- Click “Finish.”

10. Verify in phpMyAdmin:
- Optionally, you can log in to phpMyAdmin from cPanel to manage your databases. In cPanel, look for the “phpMyAdmin” icon under the “Databases” section.
- Once in phpMyAdmin, you should see the newly created databases and user.

